
How to Paint Like a Pro: Tips for Flawless Walls
Are you tired of looking at dull, lifeless walls in your home? Do you dream of transforming your living space with a fresh coat of paint but worry about achieving that professional finish? Look no further! In this comprehensive guide, we’ll walk you through the essential steps and techniques for painting your walls like a pro. Whether you’re a DIY enthusiast or a first-time painter, these professional painting tips will help you achieve flawless results that will make your walls the envy of the neighborhood.
1. Proper Preparation: The Foundation of Flawless Wall Painting
Before you even think about picking up a paintbrush, it’s crucial to properly prepare your walls. This step is often overlooked, but it’s the cornerstone of achieving a professional-looking paint job. Let’s dive into the details of how to prep your walls for painting.

Cleaning the Walls
The first step in your DIY wall painting journey is to ensure your walls are squeaky clean. Over time, walls accumulate dust, dirt, and even grease, especially in high-traffic areas or near the kitchen. These contaminants can prevent paint from adhering properly, leading to an uneven finish or peeling paint down the line.
To clean your walls:
- Start by dusting the walls with a soft, dry cloth or a duster to remove loose particles.
- Mix a solution of warm water and mild dish soap.
- Using a sponge or a soft cloth, gently wash the walls from top to bottom.
- Pay extra attention to areas near light switches, door frames, and baseboards, as these tend to collect more grime.
- Rinse the walls with clean water to remove any soap residue.
- Allow the walls to dry completely before moving on to the next step.
Repairing Imperfections
Even the most well-maintained walls can develop small imperfections over time. Addressing these issues before painting is crucial for achieving that smooth, professional finish. Here’s how to tackle common wall problems:
- For small holes and cracks: Use a spackling compound and a putty knife to fill in these imperfections. Once dry, sand the area smooth.
- For larger holes: Use a patch kit or drywall compound to repair more significant damage. Follow the product instructions carefully, and don’t forget to sand once dry.
- For nail holes: Remove any nails or screws, then fill the holes with spackling compound. Sand smooth when dry.
After repairing, run your hand over the wall to feel for any remaining rough spots. Sand these areas gently until the entire wall feels smooth to the touch.
Sanding for Smoothness
Even if your walls don’t have visible imperfections, a light sanding can make a world of difference in your final paint job. Sanding helps to remove any leftover bumps or rough patches and creates a surface that paint can adhere to more effectively.
Use a fine-grit sandpaper (180-220 grit) and sand the entire wall surface lightly. Pay extra attention to areas where you’ve made repairs. After sanding, wipe down the walls with a damp cloth to remove any dust, and allow them to dry completely.
2. Invest in Quality Painting Tools: The Secret to Professional Results
Now that your walls are prepped and ready, it’s time to gather your painting supplies. One of the most crucial professional painting tips is to invest in high-quality tools. While it might be tempting to cut costs here, using superior tools will not only make your job easier but also result in a more polished finish.
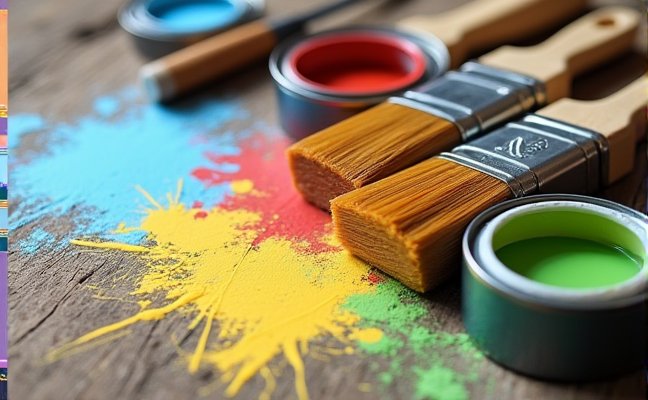
Paintbrushes
When it comes to paintbrushes, quality matters. High-quality brushes will hold more paint, apply it more evenly, and are less likely to leave bristles behind on your freshly painted wall. Look for brushes with synthetic bristles for latex paint and natural bristles for oil-based paints. Invest in a variety of sizes:
- 2-inch angled brush for cutting in around trim and corners
- 4-inch flat brush for larger areas and edges
- Small detail brush for touch-ups and hard-to-reach spots
Rollers
For larger wall areas, rollers are your best friend. Choose rollers with a nap (the fuzzy part) appropriate for your wall texture:
- 1/4-inch nap for smooth surfaces
- 3/8-inch nap for lightly textured surfaces
- 1/2-inch nap for medium to rough surfaces
Invest in a sturdy roller frame and consider purchasing a roller extension pole to reach high areas without a ladder.
Painter’s Tape
Don’t skimp on painter’s tape! High-quality tape will create crisp, clean lines and is less likely to peel off paint when removed. Look for tape specifically designed for your surface type (e.g., delicate surfaces, textured walls).
Paint Trays and Liners
Choose a sturdy paint tray with a textured surface to help distribute paint evenly on your roller. Use disposable liners to make cleanup a breeze and extend the life of your tray.
3. The Power of Primer: Laying the Groundwork for Flawless Walls
Priming your walls is a step that many DIY painters skip, but it’s a crucial part of how to paint walls like a pro. Primer serves several important functions that can significantly improve your final result:
Covering Stains and Dark Colors
If you’re painting over a dark color or a wall with stubborn stains, primer is your best friend. It creates a uniform base that allows your new paint color to shine through accurately. Without primer, you might find yourself applying coat after coat of paint, wasting time and money.
Improving Paint Adhesion
Primer creates a surface that paint can grip onto more effectively. This is especially important if you’re painting over glossy surfaces or bare drywall. Better adhesion means your paint job will last longer and be less likely to peel or chip.
Reducing the Number of Paint Coats
By creating a uniform base, primer can actually reduce the number of paint coats you need to apply to achieve full coverage. This can save you time and money in the long run.
Choosing the Right Primer
When selecting a primer, consider the surface you’re painting and your end goal:
- For new drywall: Use a drywall primer-sealer
- For previously painted walls: An all-purpose primer should suffice
- For covering dark colors: Consider a tinted primer that matches your new paint color
- For glossy surfaces: Use a bonding primer to ensure good adhesion
4. Choosing the Right Paint: The Key to Durable and Beautiful Walls
Selecting the right type of paint is crucial for achieving professional-looking results. The two main types of paint for interior walls are oil-based and latex-based, each with its own set of pros and cons.
Oil-Based Paints
Oil-based paints have been a popular choice for years due to their durability and smooth finish. They’re ideal for high-traffic areas and surfaces that need frequent cleaning.
Pros of oil-based paints:
- Extremely durable and long-lasting
- Resistant to stains and easy to clean
- Provide a smooth, glossy finish
Cons of oil-based paints:
- Longer drying time
- Strong odor during application and drying
- Require solvents for cleanup
- Can yellow over time
Latex-Based Paints
Latex-based paints have become increasingly popular for interior walls due to their ease of use and quick drying time.
Pros of latex-based paints:
- Quick drying time
- Low odor
- Easy cleanup with soap and water
- Resistant to fading and yellowing
Cons of latex-based paints:
- May not be as durable as oil-based paints
- Can raise the grain on wood surfaces
For most interior wall painting projects, latex-based paint is an excellent choice. It’s user-friendly, dries quickly, and provides a durable finish when applied correctly.
5. Mastering Painting Techniques: The Art of Flawless Wall Painting
Now that we’ve covered the preparation and materials, let’s dive into the actual painting techniques that will help you achieve that professional look. Mastering these painting techniques for walls is key to a flawless finish.

Starting from the Top
Always start painting from the top of the wall and work your way down. This strategy prevents drips and streaks from marring areas you’ve already painted. Begin with the ceiling (if you’re painting it), then move to the walls.
Cutting In
Cutting in is the process of painting the edges of your walls where they meet the ceiling, baseboards, and around windows and doors. This requires a steady hand and a good-quality angled brush.
To cut in effectively:
- Load your brush with paint, but tap off excess to avoid drips.
- Start about an inch away from the edge you’re painting up to.
- Slowly work the paint towards the edge, using the angle of the brush to create a clean line.
- Work in small sections, about 2-3 feet at a time.
Rolling Technique
For large wall areas, a roller is your best tool for efficient and even coverage.
To use a roller effectively:
- Load your roller evenly by rolling it in the paint tray, then rolling it back on the ribbed part of the tray to distribute the paint.
- Start in one corner of the wall and roll in a W or M pattern, then fill in the pattern without lifting the roller.
- Apply even pressure to avoid leaving lines or streaks.
- Work in manageable sections, about 3-4 feet square.
Maintaining a Wet Edge
One of the most important professional painting tips is to maintain a “wet edge” as you work. This means always painting into or towards the wet paint you’ve just applied. This technique helps prevent visible lines or streaks where dry and wet paint meet.
6. The Two-Coat Advantage: Ensuring Full Coverage and Uniform Finish
While it might be tempting to stop after one coat, especially if the coverage looks good, applying two coats of paint is a hallmark of professional-quality work. Here’s why two coats are essential for a flawless wall painting guide:
Better Coverage
Even with high-quality paint, one coat may not provide complete coverage, especially if you’re painting over a darker color or a repaired area. Two coats ensure that your new color is rich, vibrant, and uniform across the entire wall.
Increased Durability
Two coats of paint create a more durable finish that can better withstand cleaning, scratches, and general wear and tear. This is especially important in high-traffic areas or rooms that see a lot of activity.
Smoother Finish
The second coat helps to smooth out any inconsistencies from the first coat, resulting in a more professional-looking finish. It can hide brush strokes, roller marks, and other imperfections that might be visible after just one coat.
Applying the Second Coat
When applying the second coat:
- Allow the first coat to dry completely. Check the paint can for recommended drying times, but generally, wait at least 24 hours.
- Lightly sand any drips or imperfections from the first coat before starting the second.
- Follow the same techniques you used for the first coat, starting with cutting in and then rolling.
- Pay extra attention to areas that might need more coverage, such as around repairs or darker spots.
7. Proper Cleaning and Storage of Tools: Extending the Life of Your Painting Equipment
After you’ve finished painting, proper cleaning and storage of your tools is crucial. This not only extends the life of your equipment but also ensures they’re ready for your next painting project. Here’s how to care for your painting tools:
Cleaning Brushes and Rollers
For latex-based paints:
- Rinse brushes and rollers under running water until the water runs clear.
- Use mild soap to remove any remaining paint.
- Rinse thoroughly again.
- Gently squeeze out excess water (don’t twist brushes as this can damage the bristles).
For oil-based paints:
- Use mineral spirits or paint thinner to clean brushes and rollers.
- Rinse in clean mineral spirits until all paint is removed.
- Wash with warm, soapy water to remove any remaining solvent.
- Rinse thoroughly with clean water.
Drying and Storing Tools
After cleaning:
- Reshape brush bristles and hang brushes to dry, or lay them flat.
- Stand rollers on end to dry completely.
- Once dry, wrap brushes and rollers in plastic wrap or store in airtight containers to keep them dust-free and prevent bristles from drying out or becoming misshapen.
8. Safety First: Protecting Yourself During Your DIY Wall Painting Project
While painting might seem like a harmless activity, it’s important to take proper safety precautions to protect your health. Here are some essential safety measures to keep in mind:
Ventilation
Proper ventilation is crucial when painting indoors. Open windows and doors to create cross-ventilation, and use fans to circulate air. This helps dissipate paint fumes and speeds up drying time.
Personal Protective Equipment
- Wear a respirator or mask, especially when using oil-based paints or working in poorly ventilated areas.
- Use safety goggles to protect your eyes from paint splatters.
- Wear gloves to protect your skin from paint and cleaning solvents.
- Dress in old clothes or wear a paint suit to protect your clothing.
Ladder Safety
If you’re using a ladder to reach high areas:
- Ensure the ladder is on a stable, level surface.
- Always maintain three points of contact (two feet and one hand, or two hands and one foot).
- Never stand on the top rung or overreach.
- Have someone nearby to steady the ladder if possible.
9. Patience is Key: The Art of Taking Your Time for Perfect Results
One of the most valuable professional painting tips is to be patient throughout the entire process. Rushing any step can lead to mistakes and a less-than-professional finish. Here’s why patience is crucial:
Proper Drying Time
Allow adequate drying time between coats and before removing painter’s tape. Rushing this can result in paint peeling off with the tape or smudging your freshly painted surface.
Attention to Detail
Take your time to ensure even coverage and smooth application. Rushed brush strokes or roller marks can be visible in the final result.
Careful Cutting In
Cutting in around trim, windows, and doors requires a steady hand and patience. Taking your time here results in crisp, clean lines that define a professional paint job.
10. Final Touch-Ups: The Secret to Truly Flawless Walls
Even with the most careful application, you might notice a few imperfections once the paint has dried. This is where final touch-ups come in to perfect your DIY wall painting project:
Inspect in Good Lighting
Wait for the paint to dry completely, then inspect your walls in good natural light. Look for any missed spots, uneven coverage, or drips that need addressing.
Touch-Up Technique
- Use a small brush for precise touch-ups.
- Dab paint onto missed spots rather than brushing to blend more seamlessly with the surrounding area.
- For larger areas that need touching up, use the same roller you used for the main application to maintain a consistent texture.
Blending Touch-Ups
If you’re touching up a spot on a wall that’s already dry, try to feather the edges of your touch-up to blend it with the surrounding paint. This helps minimize the visibility of the repair.
Conclusion: Achieving Professional-Quality Results in Your DIY Wall Painting Project
By following these professional painting tips and techniques, you’re well on your way to achieving flawless walls that look like they were painted by a pro. Remember, the key to success lies in thorough preparation, using quality materials, mastering proper techniques, and having patience throughout the process.
As you embark on your DIY wall painting journey, keep in mind that practice makes perfect. Don’t be discouraged if your first attempt isn’t flawless – with each project, you’ll improve your skills and develop your own tricks for how to paint walls like a pro.
If you find yourself overwhelmed or facing a particularly challenging painting project, remember that there’s no shame in seeking professional help. As someone who’s passionate about home improvement, I’ve found that simpleHome is an excellent resource for connecting homeowners with local professionals. They can help you find experienced painters in your area who can tackle even the most complex painting jobs with ease.
Whether you decide to take on the project yourself or enlist the help of a pro, the end result will be beautiful, freshly painted walls that transform your living space and fill you with pride. Happy painting!