


How to Upcycle Old Furniture for a Fresh Look
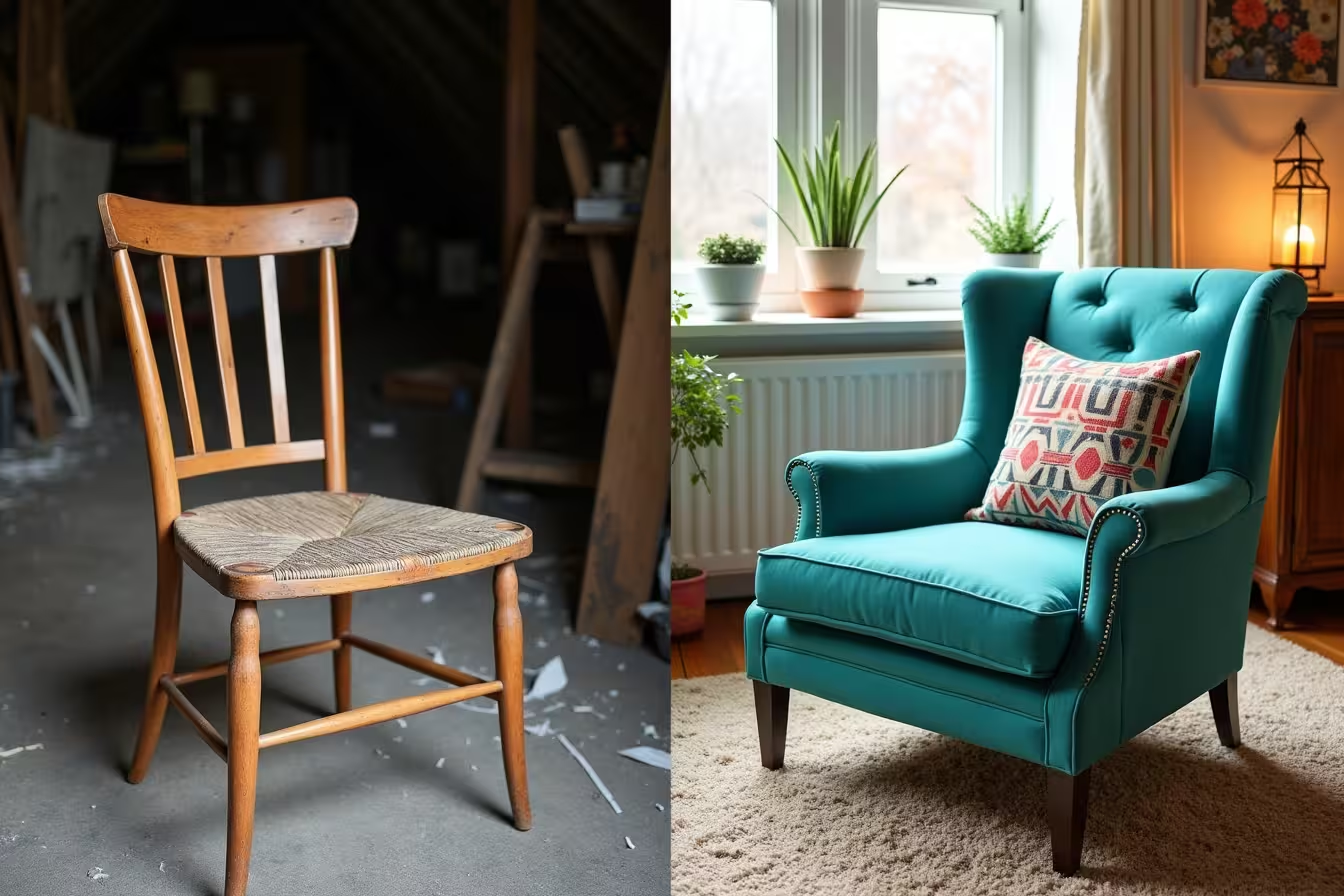
Are you tired of your old, worn-out furniture but don't want to break the bank on new pieces? Look no further! Upcycling furniture is the perfect solution to breathe new life into your home decor while being environmentally conscious and budget-friendly. In this comprehensive guide, we'll explore the art of upcycling furniture for beginners and provide you with a wealth of DIY furniture makeover ideas. So, roll up your sleeves, and let's dive into the world of furniture upcycling!
1. The Art of Selecting and Assessing Furniture for Upcycling
The first step in any successful upcycle furniture project is choosing the right piece to work with. Not all old furniture is created equal when it comes to upcycling potential. Here's what to look for when selecting a piece to repurpose:
- Solid wood construction: Opt for furniture made of solid wood rather than particleboard or MDF. Solid wood is more durable and easier to work with when it comes to sanding, painting, or staining.
- Good bones: Look for pieces with sturdy construction and minimal structural damage. While cosmetic issues can be easily fixed, major structural problems can be challenging and time-consuming to repair.
- Interesting features: Choose furniture with unique details like carved elements, interesting shapes, or vintage hardware. These features can become focal points in your upcycled piece.
- Size and functionality: Consider how the piece will fit into your space and serve its intended purpose after the makeover.
Once you've found a promising candidate, it's time to assess its condition thoroughly. Look for any signs of wear and tear, loose joints, or damaged areas that may need attention during the upcycling process.
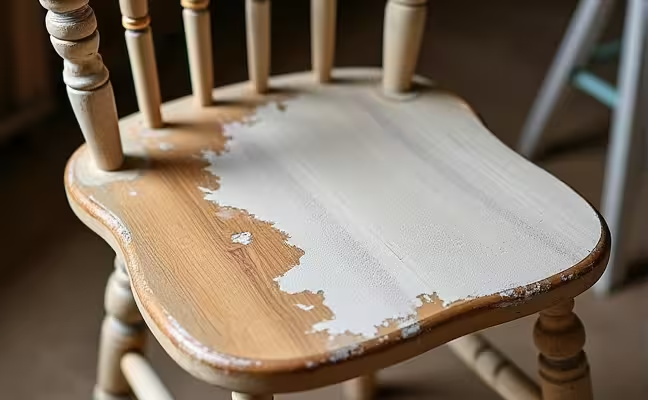
In the image above, we can see a perfect example of a piece in the midst of the upcycling process. This well-worn wooden chair demonstrates the potential for transformation, with half of it already sanded down to reveal the beautiful natural wood grain beneath years of paint. This is exactly the kind of piece that's ideal for an upcycling project – solid construction with a hint of character just waiting to be brought out.
2. Preparing Your Furniture for Upcycling
Before you dive into the fun part of upcycling, it's crucial to properly prepare your furniture. This step is often overlooked but is essential for achieving a professional-looking finish. Here's how to get your piece ready for its makeover:
Cleaning
Start by giving your furniture a thorough cleaning. Use a mild detergent or a specialized wood cleaner to remove years of accumulated dirt, grime, and oils. For stubborn stains or buildup, you might need to use a stronger cleaner, but be cautious not to damage the wood. Once clean, allow the piece to dry completely before moving on to the next step.
Sanding
Sanding is a crucial step in how to refurbish furniture. It serves two purposes: removing the old finish and creating a surface that will readily accept new paint or stain. Here's a quick guide to sanding:
- Start with a coarse-grit sandpaper (60-80 grit) to remove the old finish and smooth out any rough spots.
- Progress to a medium-grit sandpaper (120-150 grit) to further smooth the surface.
- Finish with a fine-grit sandpaper (220 grit or higher) for a silky-smooth surface.
- Always sand in the direction of the wood grain to avoid scratches.
- Use a tack cloth or vacuum to remove all sanding dust before proceeding.
Repairs
Now is the time to address any structural issues or damage. This might include:
- Tightening or regluing loose joints
- Filling holes or cracks with wood filler
- Replacing broken or missing parts
- Reinforcing weak areas
Taking the time to make these repairs will ensure your upcycled piece is not only beautiful but also functional and long-lasting.
3. Designing Your Upcycled Masterpiece
Now comes the exciting part – designing your upcycled furniture! This is where your creativity can truly shine. Whether you're looking for rustic charm, sleek modernity, or whimsical flair, the possibilities are endless when it comes to DIY furniture makeover ideas.
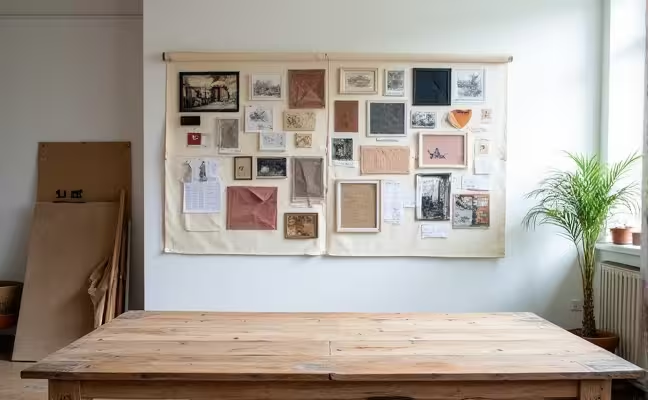
As you can see in the image above, creating a mood board can be incredibly helpful in visualizing your final product. This mood board beautifully showcases a mix of rustic and modern aesthetics, providing inspiration for colors, textures, and overall style. The old wooden table in the foreground is just waiting to be transformed based on these ideas!
Here are some popular upcycle furniture ideas to get your creative juices flowing:
- Farmhouse chic: Give your piece a distressed look with chalk paint and strategic sanding for a cozy, rustic feel.
- Mid-century modern revival: Clean lines, tapered legs, and bold colors can breathe new life into vintage pieces.
- Bohemian dream: Incorporate vibrant colors, patterns, and textures for an eclectic, free-spirited vibe.
- Industrial edge: Combine wood and metal elements for a raw, urban look.
- Coastal calm: Light, airy colors and weathered finishes can transport you to the beach.
Remember, the key to successful upcycling is to let your personality shine through. Don't be afraid to mix and match styles or try something completely unique!
4. Techniques for Transforming Your Furniture
Now that you have a vision for your piece, it's time to bring it to life. Here are some popular techniques for upcycling furniture for beginners:
Painting
Painting is perhaps the most common and transformative technique in furniture upcycling. Here's a quick guide:
- Choose your paint: Options include chalk paint, milk paint, acrylic paint, or traditional latex paint. Each has its own pros and cons, so research which is best for your project.
- Apply primer: Unless you're using a paint that doesn't require it (like chalk paint), apply a coat of primer to ensure good paint adhesion.
- Paint your piece: Apply thin, even coats, allowing each to dry completely before adding the next. Two to three coats are usually sufficient.
- Distress (optional): If you want a weathered look, lightly sand areas that would naturally wear over time.
- Seal: Apply a clear topcoat to protect your paint job and increase durability.
Staining
If you want to enhance the natural beauty of the wood, staining is a great option:
- Choose your stain: Options include oil-based, water-based, or gel stains in a variety of colors.
- Apply the stain: Use a brush or cloth to apply the stain, working in the direction of the wood grain.
- Wipe off excess: After a few minutes, wipe off any excess stain with a clean cloth.
- Apply additional coats: For a deeper color, apply additional coats once the previous coat is dry.
- Seal: Once you're happy with the color, apply a clear topcoat to protect the finish.
Decoupage
Decoupage is a fun technique that involves adhering paper or fabric to your furniture:
- Choose your material: This could be decorative paper, fabric, or even photographs.
- Cut to size: Cut your chosen material to fit the area you want to cover.
- Apply adhesive: Use a decoupage medium to adhere your material to the furniture.
- Smooth out bubbles: Use a brayer or credit card to smooth out any air bubbles.
- Seal: Apply several coats of decoupage medium over the top to seal and protect your design.
5. Adding the Finishing Touches
The final steps in your furniture upcycling journey can make all the difference in achieving a professional-looking result. Here are some ideas for those all-important finishing touches:
Hardware
Replacing old, dated hardware can dramatically change the look of your piece. Consider:
- Sleek, modern pulls for a contemporary look
- Vintage-inspired knobs for a classic feel
- Leather pulls for a boho or rustic vibe
- Colorful ceramic knobs for a playful touch
Upholstery
If your piece includes any upholstered elements, consider giving them a refresh:
- Reupholster chairs or benches with a bold, patterned fabric
- Add a cushion to a hard wooden seat for comfort and style
- Use fabric paint to update the look of existing upholstery
Decorative Elements
Consider adding some extra flair with decorative elements:
- Apply stencils for a patterned effect
- Add decorative molding for a high-end look
- Use gold leaf for a touch of glamour
- Paint a design freehand for a truly unique piece
6. Protecting Your Upcycled Masterpiece
After all your hard work, you'll want to ensure your upcycled furniture stands the test of time. Applying a protective finish is crucial, especially for pieces that will see frequent use. Here are some options:
- Polyurethane: Offers excellent protection and comes in various sheens
- Wax: Provides a subtle sheen and is easy to apply
- Polycrylic: Water-based and less likely to yellow over time
- Oil: Enhances the natural beauty of wood but requires regular reapplication
Choose a finish that complements your piece and provides the level of protection you need.
7. The Benefits of Upcycling Furniture
Upcycling furniture isn't just a fun DIY project – it comes with a host of benefits:
Sustainability
By giving old furniture a new lease on life, you're reducing waste and conserving resources. It's a great way to minimize your environmental impact and practice sustainable living.
Cost-Effective Decorating
Upcycling allows you to create custom, high-end looking pieces at a fraction of the cost of buying new. It's a budget-friendly way to refresh your home decor.
Unique, Personalized Pieces
When you upcycle furniture, you're creating one-of-a-kind pieces that reflect your personal style. No more cookie-cutter furniture from big box stores!
Skill Building
Each upcycling project is an opportunity to learn new skills and techniques. Over time, you'll become more confident in your abilities and may even discover a new passion.
Satisfaction and Pride
There's an incredible sense of accomplishment that comes from transforming something old and unwanted into a beautiful, functional piece of furniture.
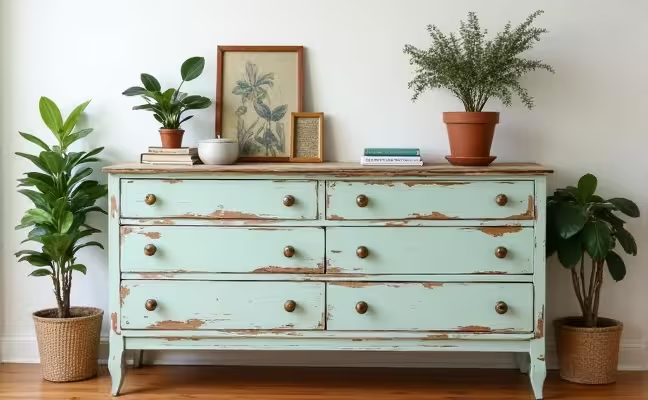
Just look at the stunning transformation in the image above! This once old and battered wooden dresser has been given new life with a fresh pastel paint job and stylish brass hardware. Styled with potted plants and vintage decor, it perfectly exemplifies how upcycling can create a unique, personalized piece that's both sustainable and cost-effective.
8. Tips for Successful Furniture Upcycling
As you embark on your furniture upcycling journey, keep these tips in mind:
- Start small: If you're new to upcycling, begin with a simple project to build your confidence.
- Plan ahead: Have a clear vision and gather all necessary supplies before you start.
- Be patient: Don't rush the process. Allow adequate drying time between steps.
- Experiment: Don't be afraid to try new techniques or color combinations.
- Document your process: Take before and after photos to showcase your transformation.
- Safety first: Always work in a well-ventilated area and use appropriate safety gear like gloves and a dust mask.
Conclusion: Embrace the Art of Upcycling
Upcycling furniture is more than just a trend – it's a creative, sustainable, and budget-friendly way to transform your living space. Whether you're looking to repurpose old furniture gathering dust in your attic or you're scouring thrift stores for hidden gems, the possibilities are endless. With a little imagination, some elbow grease, and the techniques we've discussed, you can breathe new life into old pieces and create a home that truly reflects your personal style.
Remember, every piece of furniture has potential – it's up to you to unlock it. So why not give it a try? Your next upcycling project could be the start of a whole new look for your home!
As someone who's passionate about home improvement and DIY projects, I've found that having the right resources can make all the difference. That's why I love using simpleHome. It's an incredible platform that connects homeowners like us with local professionals who can offer advice, assistance, or take on larger projects when needed. Whether you're looking for inspiration, need help sourcing materials, or want to collaborate with a pro on your next upcycling project, simpleHome is there to help. Happy upcycling!