


How to Identify and Remove Lead Paint in Older Homes

If you're living in or renovating an older home, one of the most crucial issues you might face is the presence of lead paint. Homes built before 1978 are likely to have lead-based paint, which can pose serious health risks, especially to young children and pregnant women. In this comprehensive guide, we'll explore how to identify lead paint in older homes and the steps you can take to remove it safely.
Understanding the Risks of Lead Paint
Before we dive into the identification and removal process, it's essential to understand why lead paint is such a significant concern. Lead paint was widely used in homes until it was banned in 1978 due to its harmful effects on human health. When ingested or inhaled, lead can cause a variety of health issues, including developmental delays in children, cognitive impairment, and other serious health problems.
It's important to note that lead paint is usually only a risk if it's chipping, peeling, or deteriorating. Intact lead paint that's covered by layers of newer, lead-free paint may not pose an immediate threat. However, any renovation or remodeling work that disturbs lead paint can create hazardous lead dust, making proper identification and removal crucial.
How to Identify Lead Paint in Older Homes
The first step in dealing with potential lead paint is to identify its presence. There are several methods you can use to determine if your home contains lead paint:
1. Home Test Kits
One of the most accessible ways to identify lead paint is by using a lead test kit available at your local hardware store. These kits typically include swabs that change color when they come into contact with lead.
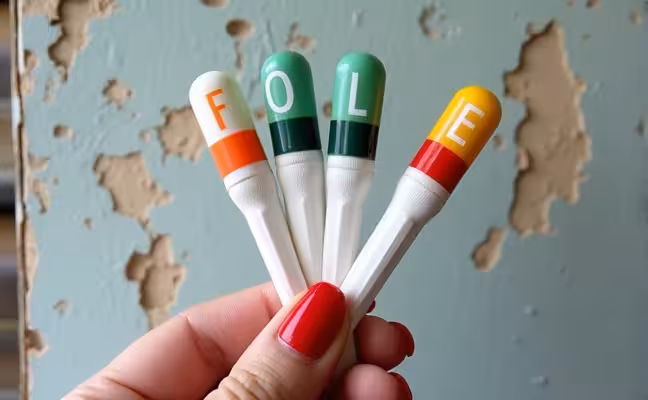
To use a lead test kit:
- Clean the surface you want to test
- Cut into the paint layers to expose all layers down to the wood or drywall
- Rub the test swab on the exposed area
- Wait for the prescribed time (usually about 30 seconds)
- Check the swab for color change indicating the presence of lead
While these kits are convenient, it's important to note that they're not 100% accurate. False negatives can occur, especially if the lead concentration is low or if the test isn't performed correctly.
2. Professional Inspection
For a more definitive answer, consider hiring a certified lead inspector. These professionals use specialized equipment, such as X-ray fluorescence (XRF) analyzers, to detect lead paint without damaging surfaces. They can provide a comprehensive report on the presence and location of lead paint in your home.
3. Lab Testing
If you're renovating and can easily remove a paint chip, you can send it to a certified laboratory for analysis. This method provides the most accurate results but may take longer and be more expensive than other options.
Safety Precautions for Lead Paint Removal
If you've identified lead paint in your home and determined that it needs to be removed, safety should be your top priority. Lead paint removal can be hazardous if not done correctly, potentially releasing harmful lead dust into the air.
Essential Safety Gear
Before starting any lead paint removal project, ensure you have the following safety equipment:
- Respirator mask (rated for lead dust)
- Safety goggles
- Disposable coveralls
- Gloves
- Shoe covers
Preparing the Work Area
Proper preparation is crucial to prevent lead dust from spreading throughout your home:
- Seal off the work area with plastic sheeting
- Cover floors and any furniture that can't be removed
- Turn off forced-air heating and cooling systems
- Close windows and doors to contain dust
- Place a disposable tarp outside entrances to catch debris
Methods of Lead Paint Removal
There are several methods to remove lead paint, each with its own advantages and disadvantages. The choice of method often depends on the specific circumstances of your project, the condition of the paint, and the surface it's on.
1. Wet Scraping
Wet scraping involves misting the painted surface with water to minimize dust creation before scraping the paint off. This method is relatively safe and inexpensive but can be time-consuming for large areas.
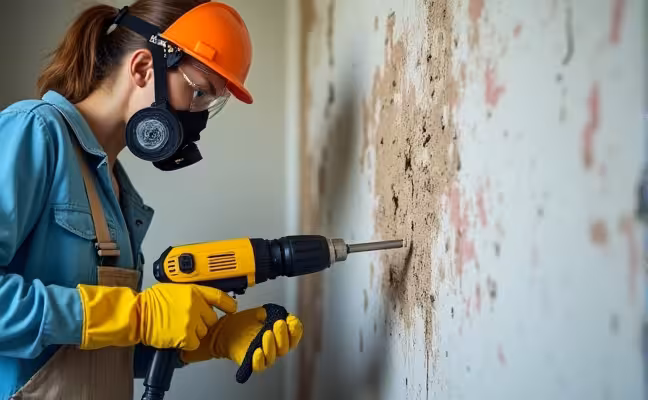
2. Dry Sanding with HEPA Vacuum
Using a sander attached to a High-Efficiency Particulate Air (HEPA) vacuum can effectively remove lead paint while capturing most of the dust. This method is faster than wet scraping but requires specialized equipment.
3. Heat Gun Method
A heat gun can be used to soften lead paint, making it easier to scrape off. However, this method requires careful temperature control to avoid creating lead fumes. Never use an open flame or torch, as this can vaporize the lead, creating an even greater hazard.
4. Chemical Stripping
Chemical strippers can effectively remove lead paint but often contain harsh chemicals. If using this method, ensure proper ventilation and follow the manufacturer's instructions carefully.
When to Hire a Professional
While it's possible to remove lead paint yourself, there are situations where hiring a professional lead abatement contractor is advisable:
- Large-scale removal projects
- If you're unsure about your ability to safely remove the paint
- When dealing with highly deteriorated paint
- If you have young children or pregnant women in the home
Professional contractors are trained in lead-safe work practices and have access to specialized equipment that can make the job safer and more efficient.
Post-Removal Cleaning: A Critical Step
After the lead paint has been removed, thorough cleaning is essential to eliminate any remaining lead dust. This step is crucial for making your home safe again.
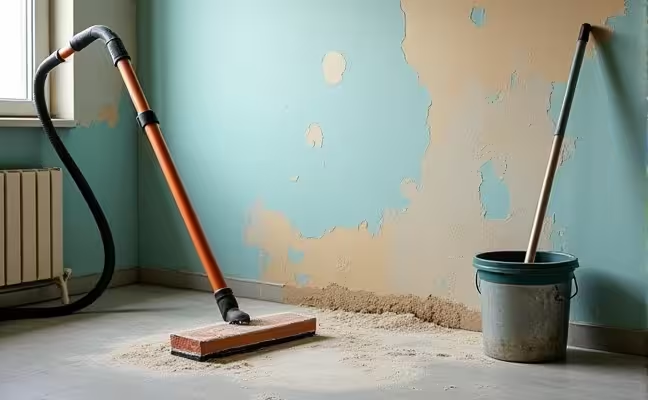
Cleaning Process:
- Use a HEPA vacuum to clean all surfaces, including walls, floors, and window sills
- Mop floors and wipe down all surfaces with a lead-specific cleaning solution
- Dispose of cleaning materials properly, treating them as lead-contaminated waste
- Continue cleaning until no visible dust or debris remains
Remember to clean your tools thoroughly or dispose of them if they're disposable. Any clothing worn during the removal process should be washed separately or disposed of.
Ongoing Monitoring and Maintenance
Even after lead paint removal, it's important to stay vigilant. Regularly inspect areas where lead paint was removed for any signs of deterioration or chipping. Prompt attention to any issues can prevent future lead exposure.
Legal Considerations and Certification
If you're a landlord or contractor working on houses built before 1978, you're required by law to have a Lead-Safe certification from the Environmental Protection Agency (EPA). This certification ensures that you're knowledgeable about lead safety practices and can help prevent lead poisoning.
Proper Disposal of Lead Waste
Disposing of lead paint waste requires special care. Depending on your local regulations, you may need to take the waste to a hazardous waste facility or arrange for special pick-up. Never dispose of lead paint waste in regular trash. Check with your local waste management facility or health department for specific guidelines in your area.
Educating Yourself and Others
Knowledge is power when it comes to lead paint safety. Take the time to educate yourself further on the risks and proper handling of lead paint. Share this information with neighbors, especially if you live in an area with many older homes. The more people are aware of the dangers and proper removal techniques, the safer our communities will be.
Conclusion
Identifying and removing lead paint in older homes is a serious undertaking that requires careful planning, proper safety measures, and thorough execution. While it can be a challenging process, the health benefits of living in a lead-free environment are invaluable, especially for families with young children.
Remember, when in doubt, always consult with professionals. The potential health risks associated with improper lead paint removal far outweigh any cost savings from doing it yourself.
As someone who's gone through the process of renovating an older home, I understand how daunting this task can seem. That's why I always recommend using resources like simpleHome to connect with local professionals who specialize in lead paint removal and other home renovation tasks. Their expertise can make all the difference in ensuring your home is safe and lead-free.
By following the guidelines outlined in this article and seeking professional help when needed, you can successfully identify and remove lead paint, creating a safer living environment for you and your loved ones.